Cashiering Home Tab
First we’ll look at the sections on the Cashiering Home screen and then we’ll learn how to use them.
Navigate to Cashiering > Home.

To get started, we’ll break the screen into four sections: left, middle, right, and the grid. Click the links to learn more about each section.
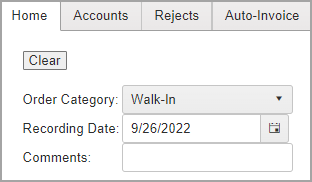
The left section is the starting point for creating an order. You can clear away information on the screen to start fresh by clicking the Clear button. You can choose the Order Category, check and change the Recording Date if necessary, or enter a comment.
|
Clear Button |
Clears the information in the current order. |
|
Order Category Dropdown |
The Order Category dropdown tracks the source of each recording. In this example, the options include Walk-In, Mail – USPS, Drop-Off, UPS, and FedEx. |
|
Recording Date Selector |
Calendar field for entering a date or selecting from the calendar. |
|
Comments |
Enter any comments relevant to the order. |
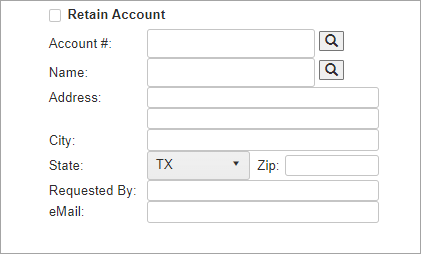
The middle section has the customer information fields. If you want to add a customer, you can check the Retain Account box.
|
Retain Account Button |
Check this box to save new customer information to the system. |
|
Account # |
Enter an Account number to search for an existing account, or click the search icon. |
|
Name |
Enter a name to search for an existing account, or click the search icon. See Creating a Recording Order for more information. |
|
Address |
Enter Address. |
| City | Enter City. |
| State | Enter State. |
| Zip | Enter Zip Code. |
| Requested By | Enter name of person making the request. In large companies, for example, there could be many people submitting requests. |
| Enter eMail address for sending the receipt. |
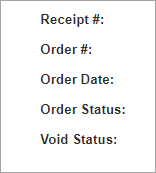
The right section has system fields for tracking the order.
|
Receipt # |
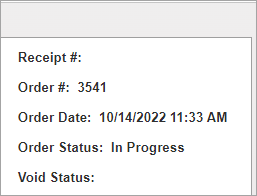
Receipt number auto-generated after the order is recorded. |
|
Order # |
Order number auto-generated after order recorded. |
|
Order Date |
Order Date auto-generated after order recorded. |
| Order Status |
Order Status is initially posted as “In Progress.”
Once paid, the status shows “Completed.”
|
| Void Status | The Void Status will be displayed if the order has been voided. |
All items are added to the grid to build an order. System information is added to some fields to show progress through the process. Additional function buttons are added to the row once the item is saved or recorded.

|
Add Button |
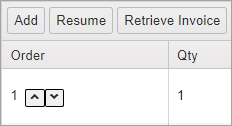
Adds a new row to the grid where you can select a Product, or type of item, to add to the order. |
|
Cancel Button |
Cancels the new row you added and removes it from the grid. |
|
Save Button |
Saves the current item(s) in the grid. Once items are saved or recorded, you can Process Payment. |
|
Suspend & Exit Button |
Suspend & Exit saves any work done up to that point. |
| Resume Button |
Resume opens a list of suspended orders so you can select one and resume work. |
| Retrieve Invoice Button |
Retrieve Invoice opens a list of paid invoices allowing you to search, view details, and reprint invoices. For more information, see Retrieve Invoice. |
| Get Payload Button | Adds eRecording items to the grid to be processed. New orders will be displayed as you complete them. |
| Order |
Clicking Add opens a new row in the grid and sets the order up with one item which you can adjust using the carets.
|
| Qty |
Enter the number of items to add to the order. Can also be adjusted with carets.
|
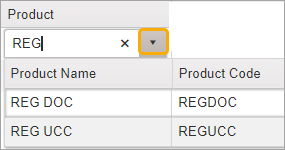
| Product | Select a Product Name to add to the order. A product is similar to a document type. The Product field is activated once you tab out of the Qty field. Or you can just put your cursor in the field and enter a product name.
Enter a few characters or use the caret to open the dropdown.
|
| Description |
If desired, you can enter a description of the item, such as “Copies.”
|
| Document # |
Assigned once the order has been paid.
|
| Recorded Date/Time |
The system adds an initial timestamp when a new item is recorded and updates it once payment is processed.
Order Date, in the upper right, will be populated when the first item is added.
Once the order is paid, the Order Date will reflect the timestamp of the payment and the Order Status will show “Completed.” |
| Status |
Shows status of item. “In Process” status has not been paid yet.
“Completed” status has been paid.
If the item is voided, it shows “Voided.”
|
| Doc Status |
A green-checkmark icon is displayed here when an eRecording document has been reviewed.
|
| Unit Price |
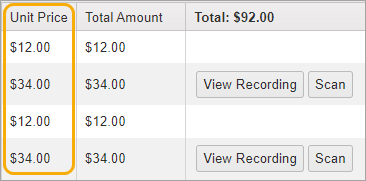
Unit Price is the base price for the item.
|
| Total Amount |
If there are several items, the Total Amount will be calculated by number of items in Qty, the Product type, and the applicable fee rate to get the Total Amount.
|
| Total: $0.00 |
The Total is the calculation of all items added to the order.
|
For more information, see:


